The Only Recipe Resource Linky Party and Blog Train - Get recipes from around the world, share yours and stir up visitors to your own food blogs. Find recipes, desserts, dinner ideas, holidays, beverages, kitchen tips, how-to, link parties, blog hops, blogtrains, and much more. Join the Party!
Summer Recipe Party
Summer Vegan Vegetable Soup
Summer Vegan Vegetable Soup
Here is another delicious and easy soup recipe that can be adapted countless ways to incorporate whatever fresh vegetables and herbs you have available and made in your Instant Pot®. Be sure to add a splash of fresh lime juice right before serving to brighten the flavors!
Prep time: 15 minutes
Active cook time: 7-8 minutes (+ time to come to
pressure)
Natural release: 10 minutes
Serves: 4-6
Ingredients:
1 T. extra virgin olive oil
4 large stalks celery, chopped
4 large carrots, sliced
1 medium red onion, chopped
1 t. garlic powder
1 t. chili powder
Sea salt & black pepper, to taste
6 vegetable broth, preferably organic
1 lb. red potatoes, quartered
2 whole bay leaves
1 pint cherry or grape tomatoes, chopped
2 c. baby kale, roughly chopped
2 T. fresh lime juice
Directions:
1.
Add olive oil to Instant Pot® and select the “Sauté”
function. Add garlic, celery, carrots, red onion, garlic powder, and chili
powder. Season with salt and black pepper, to taste, and stir to combine.
2.
Sauté, stirring occasionally, until fragrant and
vegetables start to turn golden brown, approximately 4-5 minutes. Add broth and
stir to combine, scrapping any brown bits off the bottom of the pot in the
process. Turn the unit off.
3.
Add potatoes, bay leaves, and chopped tomatoes to the
pot. Add lid and lock into place. Switch the vent to “Sealing” and set the
“Manual” setting to 3 minutes.
4.
When cook time is complete, allow pressure to release
naturally for 10 minutes, then manually release any remaining pressure.
5.
Remove lid and discard the bay leaves. Stir in baby
kale and lime juice, and season with additional salt and black pepper, if
desired. Stir to combine and serve immediately. Enjoy!
As an Amazon Associate I earn from qualifying purchases.
I may receive a small commission, at no cost to you, if you make a purchase though a link!"
Whether you host a monthly freebie train, or an everyday meme or theme party, there is a category for each.
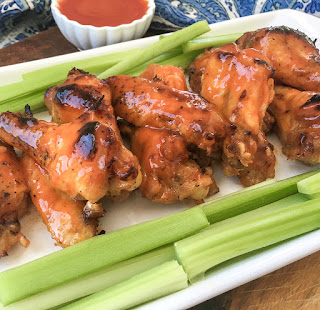
Summer Favorite Buffalo Chicken Wings
Summer Favorite Buffalo Chicken Wings
For this recipe we are going to utilize my Instant Pot®.
Nothing beats the convenience of an Instant Pot® for quick, easy, and healthier
chicken wings. Once cooked, a quick trip under the broiler is all you need to
get that nice crispy finish.
You can save time by purchasing already-trimmed wings. However, you can save some money by trimming them yourself. See photo for approximate location of where to cut each whole wing. They are a little easier to trim AFTER they’ve been cooked. Immediately freeze the tips to make chicken stock later.
Note: This recipe is written for fresh or thawed wings. If using frozen wings, add 3-4 minutes to the active cook time.
Prep time: 10 minutes
Active cook time: 14-16 minutes (+ time to come to
pressure)
Natural release: 10 minutes
Serves: 4-6
Ingredients:
4-4½ lbs. chicken wings
1 t. garlic powder, divided
Salt and black pepper, to taste
1 c. water
Sliced celery, for serving
Buffalo Wing Sauce Ingredients:
1 c. Frank’s original hot sauce
½ c. unsalted butter, melted
½ t. garlic powder
Directions:
1.
Sprinkle wings with the garlic powder and season with
salt and black pepper, to taste. Place metal trivet inside Instant Pot® and add
one cup of water. Arrange seasoned wings on top of the trivet before securing
the cover in place. Switch the vent to “Sealing” and adjust the “Manual”
setting to 8 minutes.
2.
While the wings cook, whisk the Frank’s hot sauce, melted
butter, and remaining garlic powder in a medium bowl until thoroughly combined.
Set aside.
3.
When done cooking, allow pressure to naturally release
for 10 minutes, then do a quick release for any remaining steam. Carefully
remove lid and transfer
wings to a large bowl. Set aside until just cool enough to handle.
4.
Meanwhile, position top oven rack in the top position
and pre-heat broiler to high. Line a large, rimmed baking sheet with aluminum
foil and place a wire cooling rack on top. Set aside.
5.
Pour 1/3 of the buffalo sauce on top of the wings and
toss to coat. Transfer the wings to the wire rack on the prepared baking sheet
and place under the broiler for 3-4 minutes or until the wings start to get
crispy and develop some color. Turn the wings and repeat this process.
6. Remove baking sheet from oven and toss the wings with half of the remaining buffalo sauce. Serve immediately with sliced celery and the remaining sauce on the side for dipping. Enjoy!
As an Amazon Associate I earn from qualifying purchases.
I may receive a small commission, at no cost to you, if you make a purchase though a link!"
Whether you host a monthly freebie train, or an everyday meme or theme party, there is a category for each.


